Hand-knitting techniques: knit, purl, garter stitch and ribbing
An introduction to hand knitting: knit and purl stitches, garter stitch, ribbing, cables and lace. What matters when turning a sweater design into a sample?
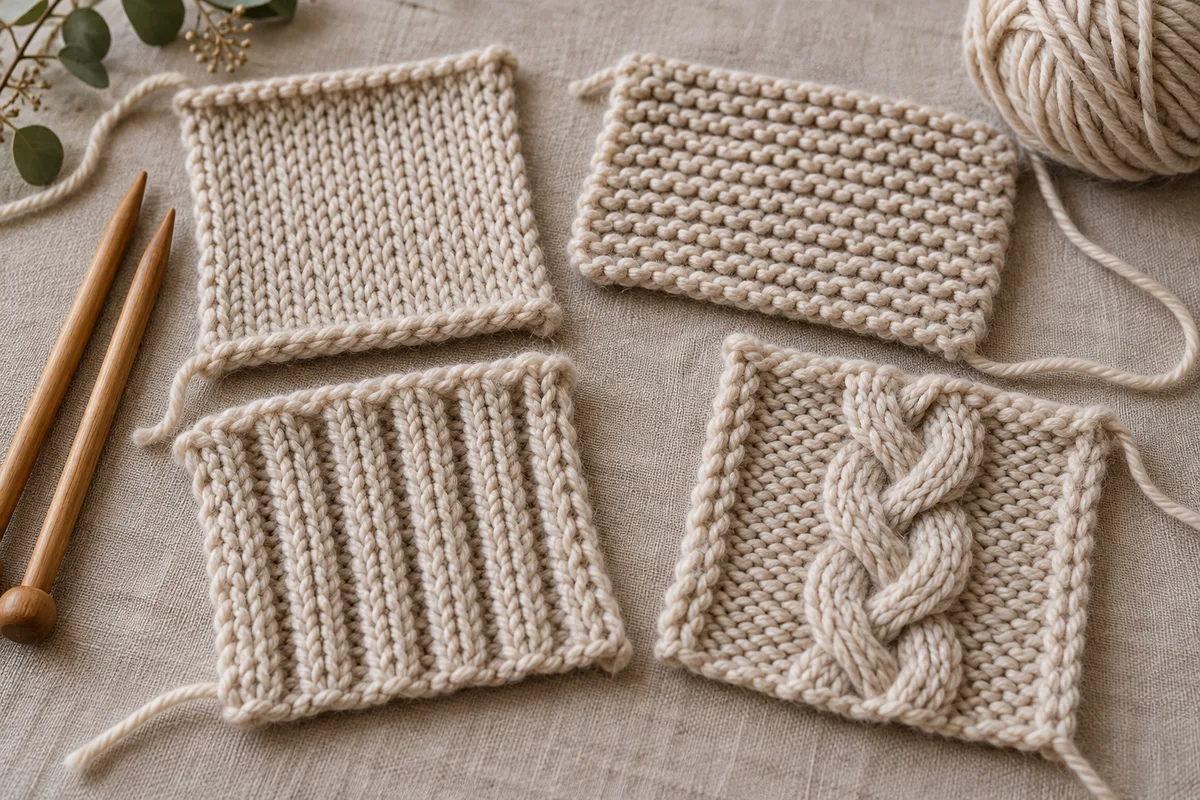
Different surfaces from two basic stitches
Knit and purl stitches form the basis of many hand-knitted surfaces. Stockinette has small V shapes on the right side and bumps on the reverse. When working flat, alternating a knit row and a purl row produces stockinette; knitting every row produces garter stitch. The sequence changes in the round: knit every round for stockinette, and alternate knit and purl rounds for garter stitch.
Ribbing, cables and lace
Ribbing combines columns of knit and purl stitches; 1×1 and 2×2 are common examples. Cables are formed by crossing groups of stitches, while lace uses openings created through increases and decreases. Chart symbols can vary between publications, so read the chart key before starting.
Begin with a small trial
Choose one yarn and needle size, then make a stockinette swatch followed by a rib swatch. Label each with the yarn code, needle size and knitting direction. Compare stitch counts over the same measurement area away from the edges. Record differences in handle, stretch and appearance; do not change all the variables at once when trying a new technique.
From a hand-knitted reference to production
A hand-knitted sample is useful for communicating a design’s surface, but machine knitting does not automatically reproduce it exactly. When sending a sample to Bark Knitwear, share the front and back of the pattern, finished measurements and desired handle. Technical feasibility and a production sample are assessed first. This is an introductory guide; an archive garment on the cover is not a step-by-step hand-knitting photograph.